


 Flare
Flare
 PHP
PHP
 JavaScript
 Protocol
Quick start
By the end of this guide, the Flare client is running in your browser app: it reports errors, shows your real source code in stack traces instead of minified code, and traces your page loads.
Looking for the V1 docs of the JavaScript SDK? You can find them here.
Install and start the client
You need a Flare account and a project key, which you can find on your project's settings page.
The interactive guide below is the fastest way to get started. It fills in your real project key for you when you are logged in, and gives you copy-paste commands to install the package and start the client. Or you can let an AI agent do all the work for you by using the install prompt.
This guide covers every supported setup. Follow only the steps that match your project: conditional instructions start with a bold "If ..." line describing when they apply. Steps without such a line always apply. Install commands use
npm install. Swap that prefix for the project's own package manager:yarn add,pnpm add, orbun add. ReplacePROJECT PUBLIC KEYwith the project's public key. You can find it in the project settings on https://flareapp.io.
Step 1: Install the package using NPM, Yarn, pnpm, or Bun
If you don't upload sourcemaps to Flare:
npm install @flareapp/js
If you use Vite and upload sourcemaps to Flare:
npm install @flareapp/js @flareapp/vite
If you use Webpack and upload sourcemaps to Flare:
npm install @flareapp/js @flareapp/webpack
If you use Next.js and upload sourcemaps to Flare:
npm install @flareapp/js @flareapp/nextjs
Step 2: Register Flare & configure
Initialize Flare in your app.js or index.js file:
If you upload sourcemaps to Flare:
In app.js:
import { flare } from "@flareapp/js";

// Only enable Flare in production, we don't want to waste your quota while you're developing:
if (process.env.NODE_ENV === 'production') {
    flare.light();
}
If you don't upload sourcemaps to Flare:
In app.js:
import { flare } from "@flareapp/js";

// Only enable Flare in production, we don't want to waste your quota while you're developing:
if (process.env.NODE_ENV === 'production') {
    flare.light('PROJECT PUBLIC KEY');
}
If you enable tracing:
Tracing shows you where time goes during a page load, a navigation, and the requests your page makes. Add this inside the same production check, after flare.light(). Read more in how tracing works and sampling.
In app.js:
flare.configure({
    enableTracing: true,
    // Sends 10% of traces. Raise it for more detail, lower it to save quota.
    tracesSampleRate: 0.1,
});
If you use Vite and upload sourcemaps to Flare:
Configure Vite to upload sourcemaps to Flare:
In vite.config.js:
import { defineConfig } from 'vite';
import flareSourcemaps from '@flareapp/vite';

export default defineConfig({
    plugins: [
        flareSourcemaps({
            apiKey: 'PROJECT PUBLIC KEY'
        }),
    ],
});
If you use Webpack and upload sourcemaps to Flare:
Configure Webpack to upload sourcemaps to Flare:
In webpack.config.js:
const { FlareWebpackPlugin } = require("@flareapp/webpack");

module.exports = {
    // ...
    devtool: "source-map",
    plugins: [ new FlareWebpackPlugin({ apiKey: "PROJECT PUBLIC KEY" }) ],
};
If you use Next.js and upload sourcemaps to Flare:
Wrap your Next.js config with withFlareSourcemaps in next.config.mjs:
In next.config.mjs:
import { withFlareSourcemaps } from '@flareapp/nextjs';

export default withFlareSourcemaps({
    // your normal Next.js config
}, {
    apiKey: 'PROJECT PUBLIC KEY',
});
Step 3: Connect your project key
If you upload sourcemaps to Flare:
When you install Flare's sourcemap build plugin, the build plugin injects your public key so flare.light() can run without an explicit key. Make sure you add the domains of your application in the project settings on Flare.
If you don't upload sourcemaps to Flare:
Pass your public key directly to flare.light('PROJECT PUBLIC KEY') and make sure you add the domains of your application in the project settings on Flare.
Step 4: Verify your setup
Add this code temporarily to verify everything is working:
In app.js:
flare.test();
If you use Vite and upload sourcemaps to Flare:
Run your Vite build command. You should see the following lines in the output:
@flareapp/vite: Uploading xx sourcemap(s) to Flare.
@flareapp/vite: Successfully uploaded all sourcemaps to Flare.
If you use Next.js and upload sourcemaps to Flare:
Run next build. You should see the following lines in the output:
@flareapp/webpack: Uploading 4 sourcemap(s) to Flare.
@flareapp/webpack: Successfully uploaded all sourcemaps to Flare.
Prefer to install and configure the client by hand, or not logged in? Install the package:
npm install @flareapp/js
yarn add @flareapp/js
pnpm add @flareapp/js
bun add @flareapp/js
Then add this near the top of your application's entry file, before any other code runs, so the client can catch errors as early as possible:
import { flare } from '@flareapp/js';

if (process.env.NODE_ENV === 'production') {
    flare.light('YOUR PROJECT KEY');
}
The guard keeps the client off during local development, so you don't use up your quota while you work.
flare.light() switches on the client's automatic error listeners. From that point on, unhandled errors and unhandled promise rejections are caught and sent to Flare on their own, without any extra code from you.
Check that errors arrive
Add a test error somewhere your code runs after flare.light(), for example in a button's click handler:
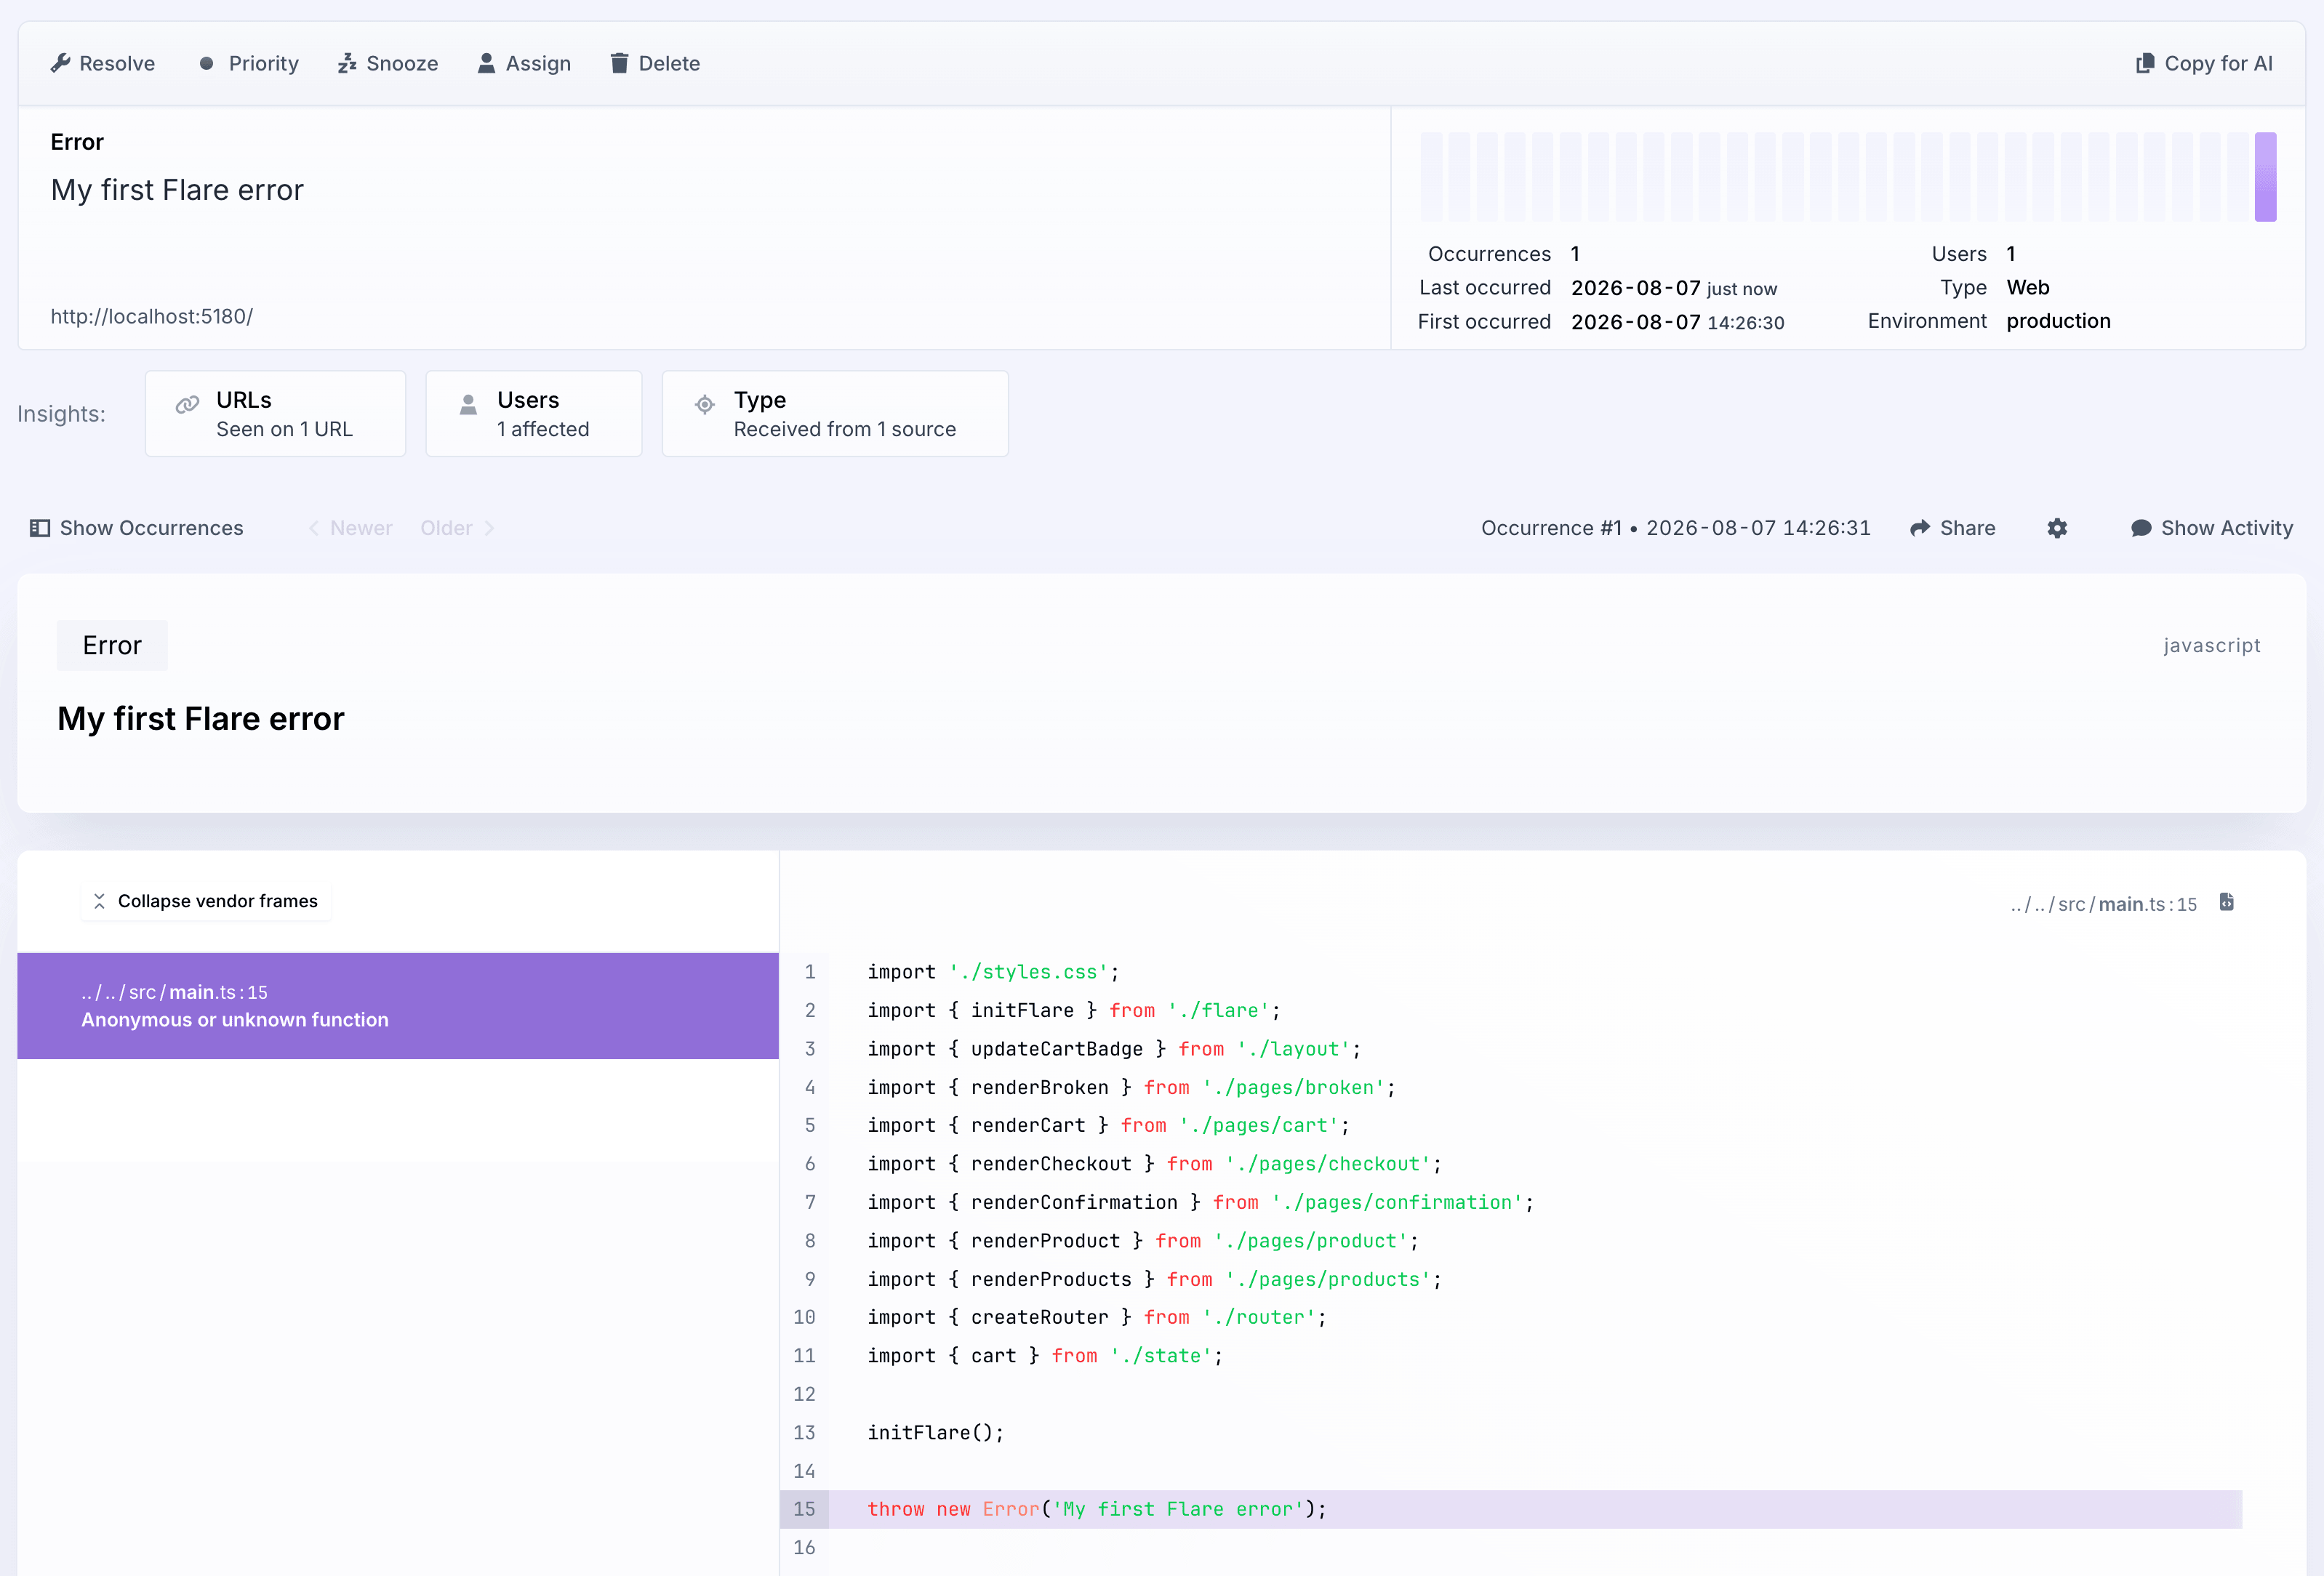
throw new Error('My first Flare error');
Trigger it, then open your project in Flare. The error shows up within a few seconds, with its message, a stack trace, and the browser it came from. Remove the test error once you have confirmed it arrived.
See your real source code
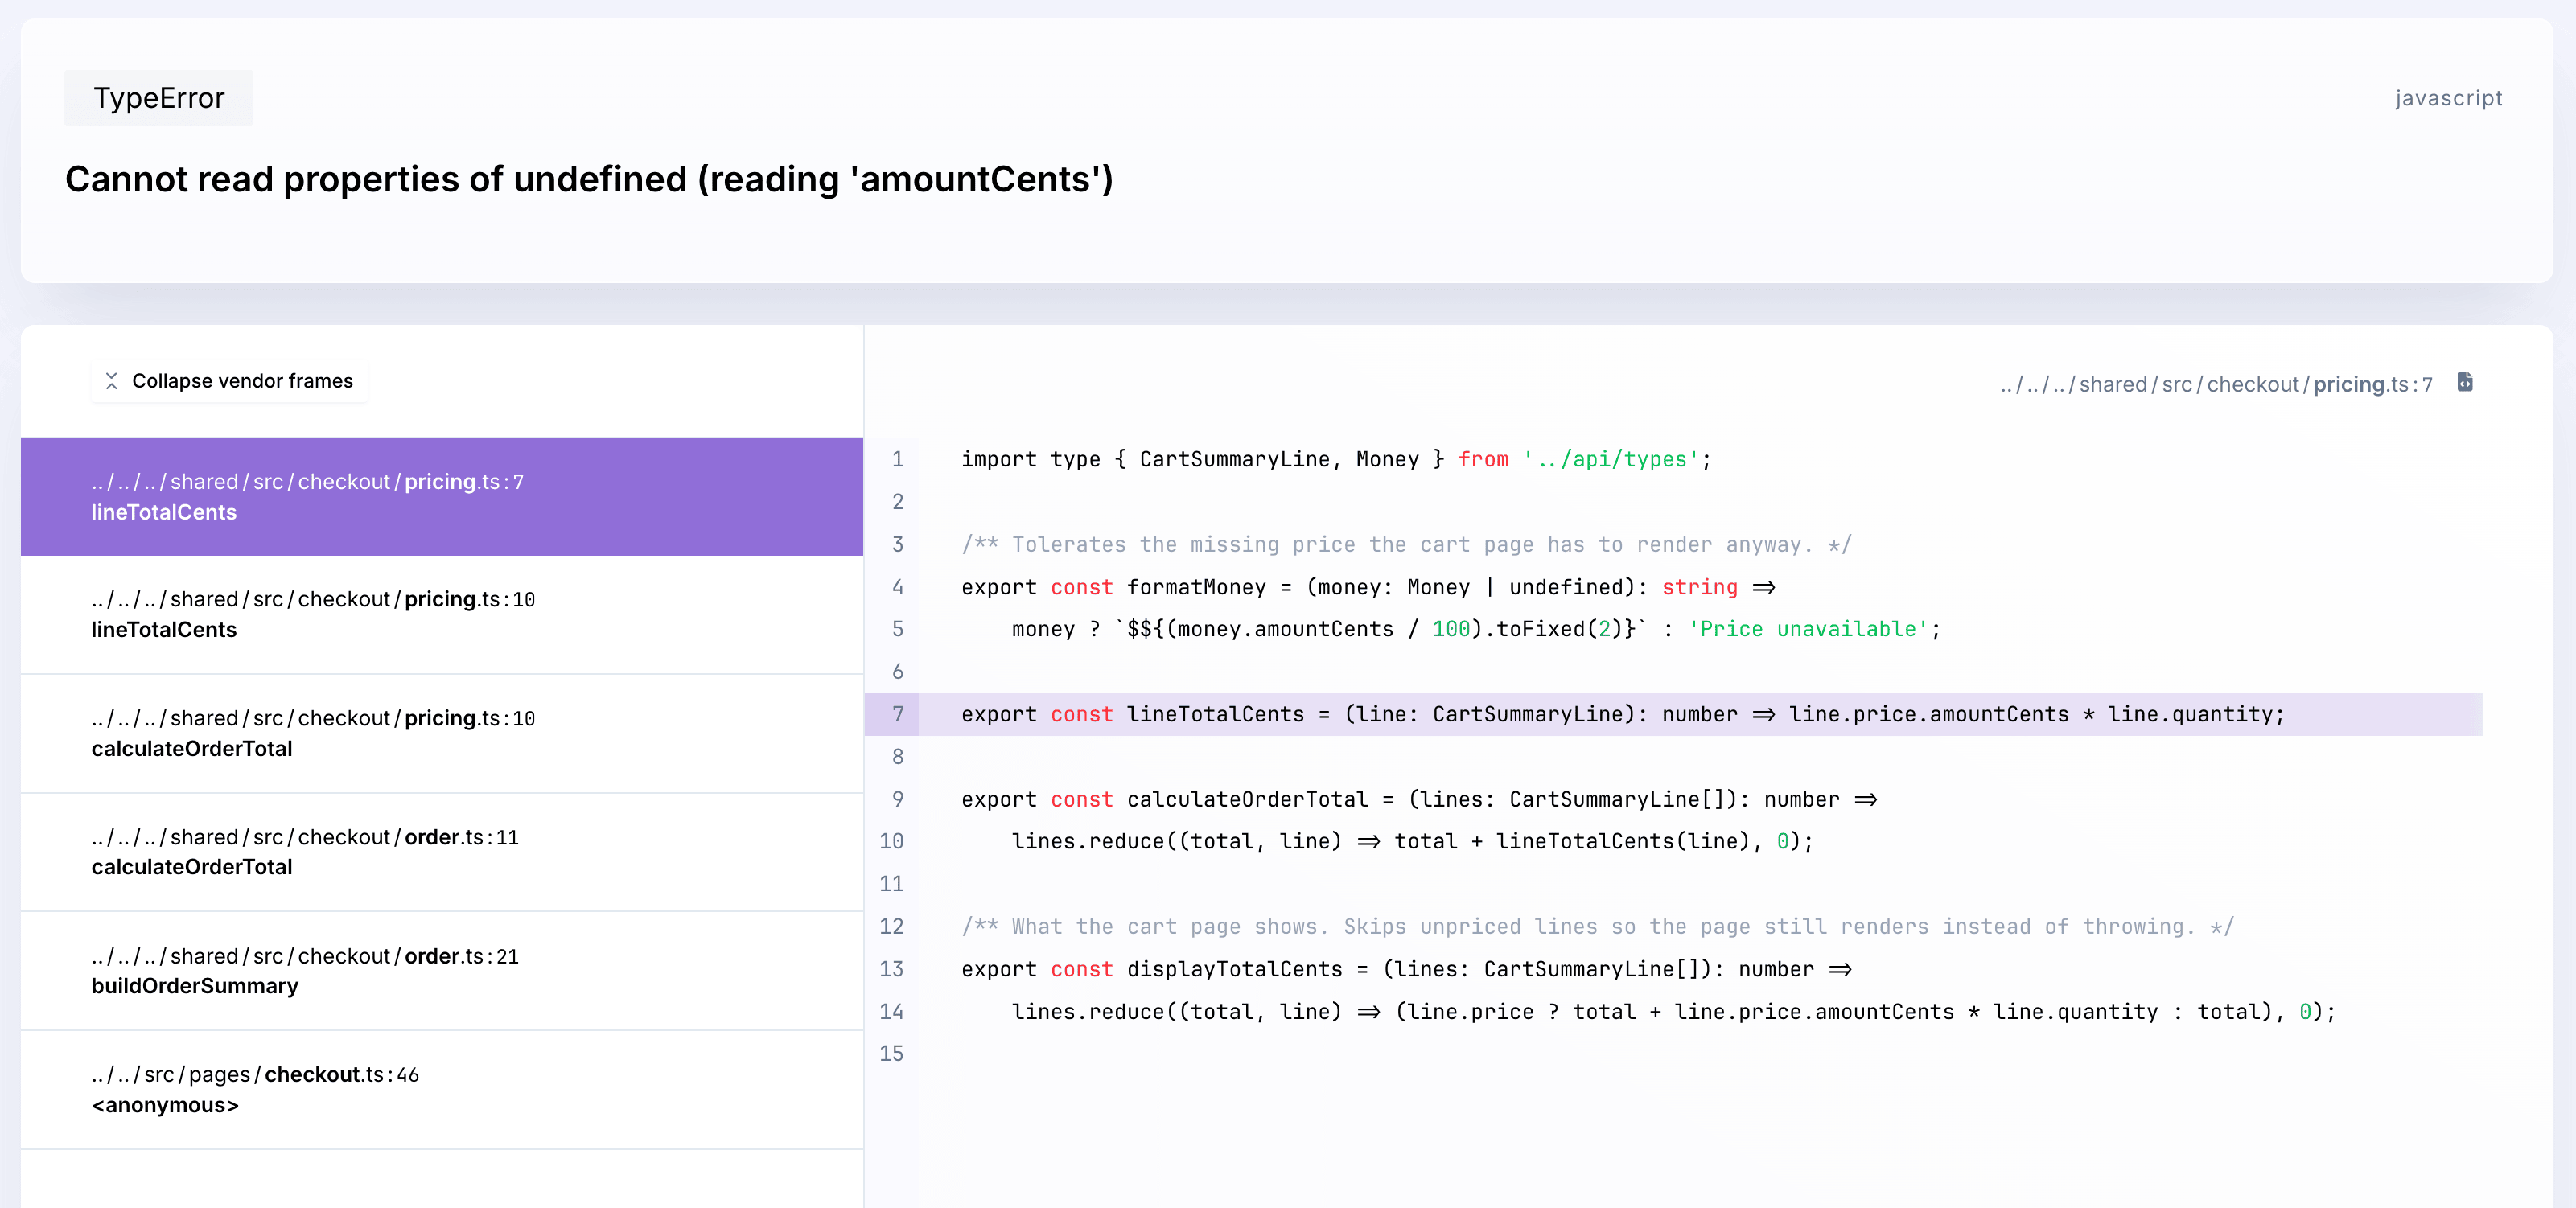
If you bundle your code for production, the stack trace above points at minified, bundled output instead of the file and line you actually wrote. Fix that by uploading a sourcemap after every build, using the Vite or Webpack plugin.
Install the plugin for your bundler:
npm install @flareapp/vite
npm install @flareapp/webpack
Then add it to your build config:
// vite.config.ts
import { defineConfig } from 'vite';
import flareSourcemaps from '@flareapp/vite';

export default defineConfig({
    plugins: [
        flareSourcemaps({
            apiKey: 'YOUR PROJECT KEY',
        }),
    ],
});
// webpack.config.js
const { FlareWebpackPlugin } = require('@flareapp/webpack');

module.exports = {
    devtool: 'source-map',
    plugins: [
        new FlareWebpackPlugin({
            apiKey: 'YOUR PROJECT KEY',
        }),
    ],
};
Run your build. Both plugins upload the sourcemap for you and print a line confirming the upload. They also inject your project key into the build, so flare.light() works without an argument once the plugin is set up.
Both plugins run on Node 18 or newer, Node 22 recommended.
For Next.js, Laravel Mix, or uploading a sourcemap manually, see sourcemaps.
Turn on tracing
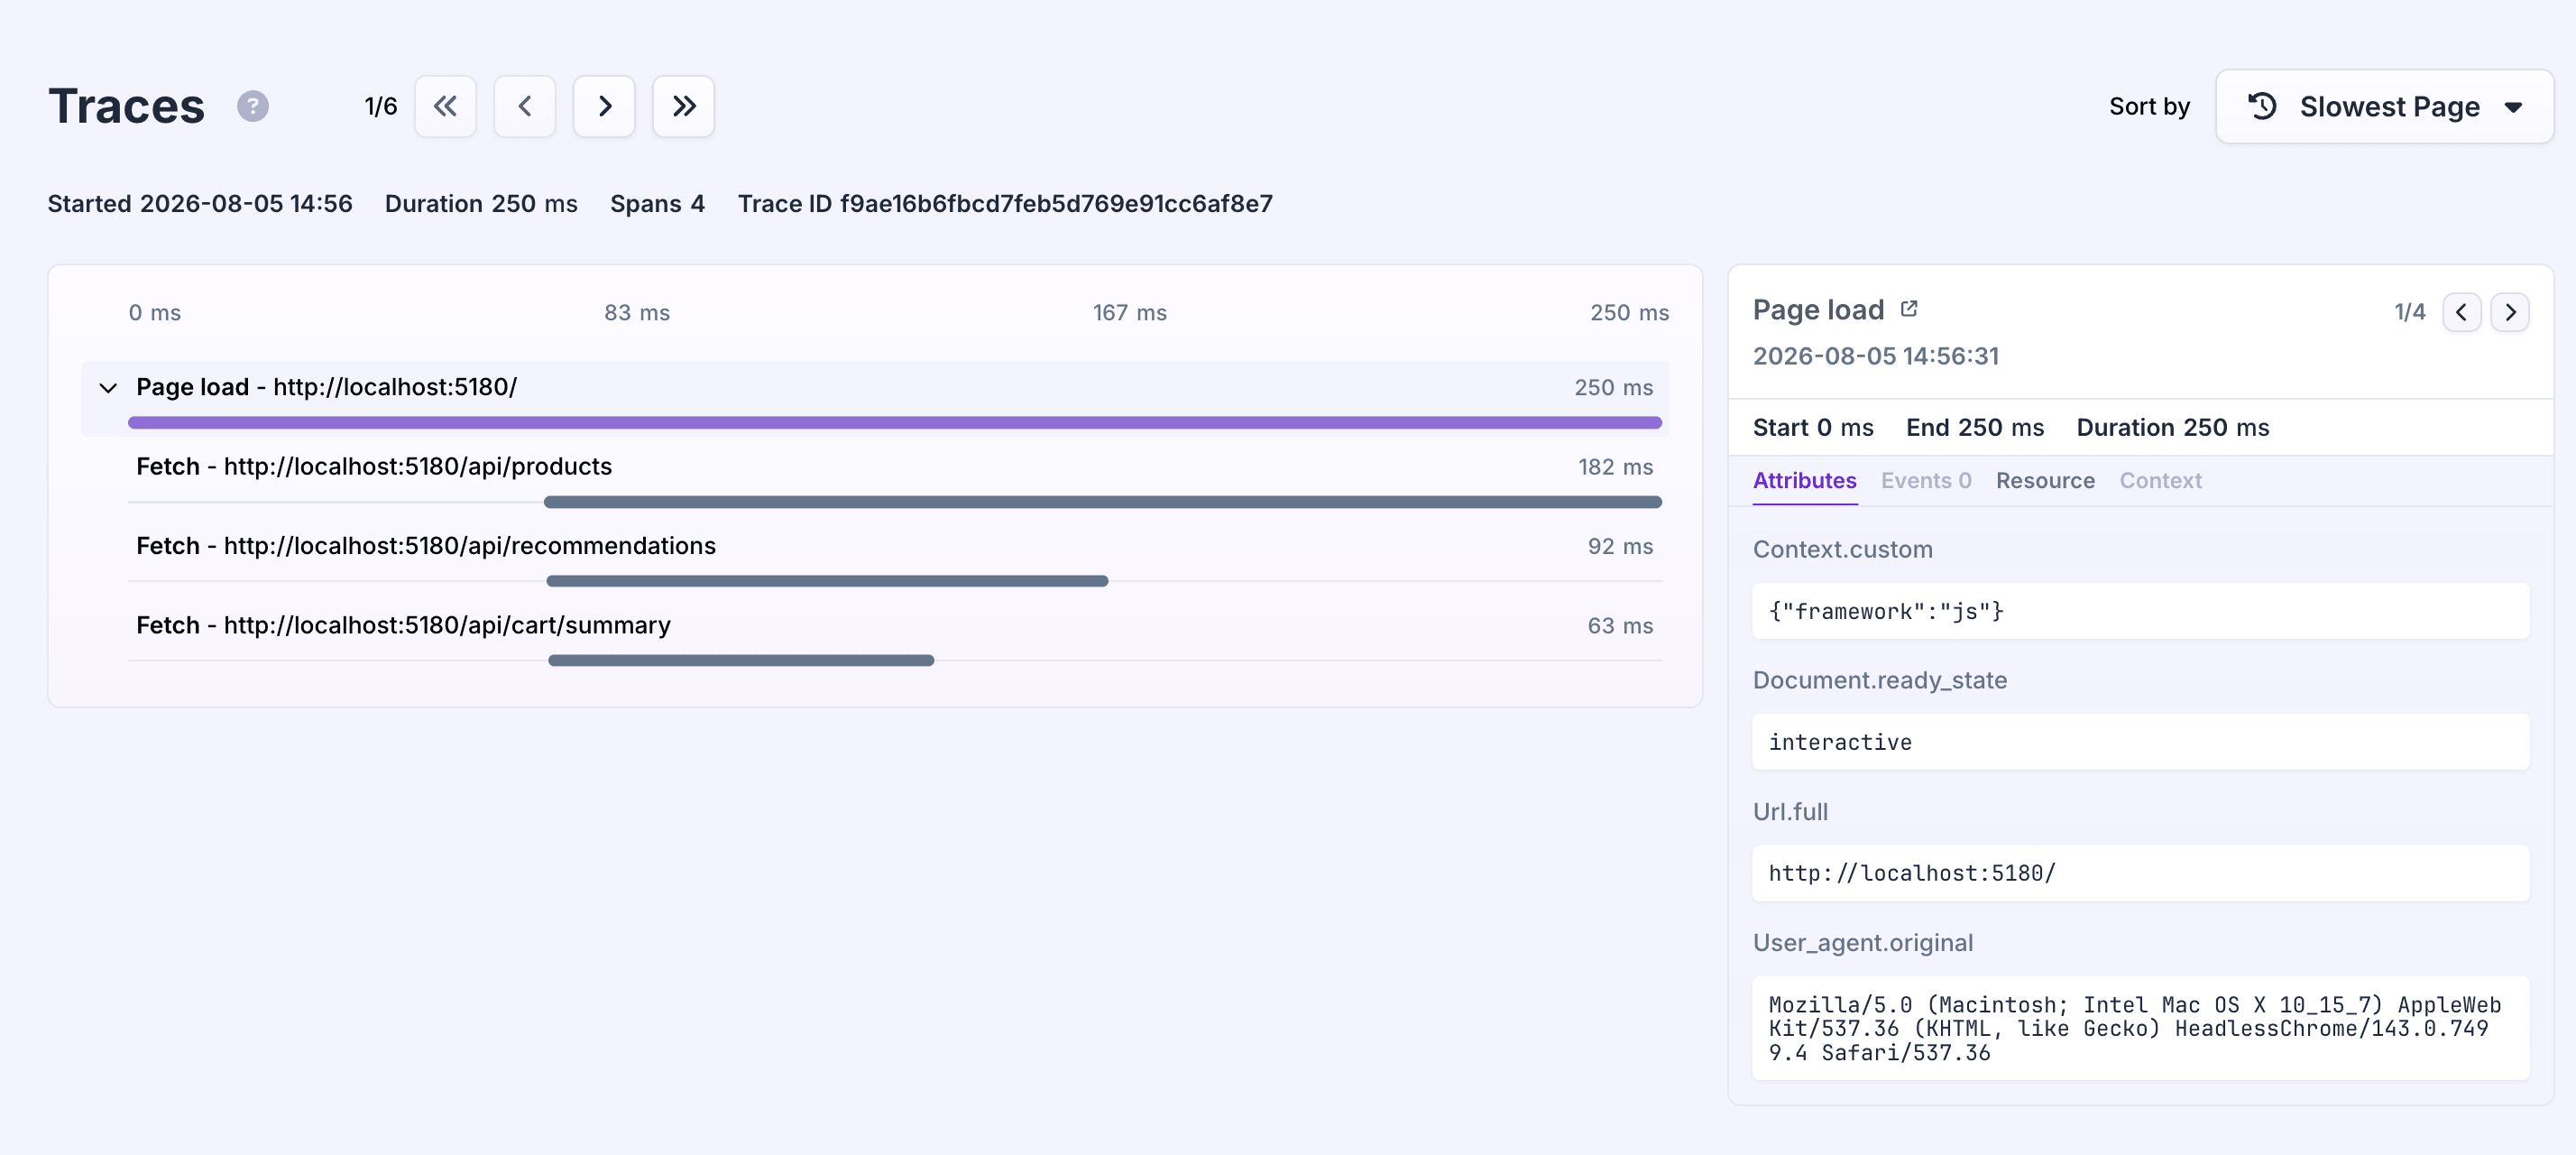
Tracing shows you where time goes during a page load and in the requests your page makes. Turn it on with flare.configure():
import { flare } from '@flareapp/js';

flare.configure({
    enableTracing: true,
    tracesSampleRate: 1,
});
enableTracing defaults to false, so tracing is off until you set it. tracesSampleRate controls what fraction of traces gets sent, from 0 to 1, and defaults to 1, meaning every trace is sent. Lower it once you have real traffic, so you don't ship a trace for every single page load.
Once tracing is on, the browser client automatically traces three things: each page load becomes a span, each client side navigation becomes a span, and each fetch or XMLHttpRequest call your page makes becomes a child span inside the current one. Without a router integration, a navigation span is named by the raw URL it navigated to instead of the matched route, and the client does not time component mounts. Both need a framework package: see the React, Vue, Svelte, or Inertia quick start.
Read more in how tracing works and what gets traced.
Common problems
flare.light() was never called. This happens if you only call it behind a production guard, as shown above, so it never runs in development. When the API key is unset, calls to flare.report() and flare.reportMessage() are silently ignored: no error is thrown, and nothing is queued. Set debug: true in flare.configure() to see a console warning when this happens.
Errors don't arrive while you develop. This is expected if you guard flare.light() to production only, as above. To confirm your setup works, test it in a production build on your machine instead of relying on your dev server.
The project key is wrong or missing. A missing key produces the same silent no-op as the first problem above. A key that is set but wrong, for example a typo or a key copied from a different project, passes that check, so the request goes out, but Flare rejects it and nothing appears in your dashboard. Set debug: true to see the failed request logged to the console.
A browser extension is throwing the errors. Flare ignores errors it thinks come from a browser extension by default, because that code isn't yours and usually isn't relevant to your app. This is controlled by the reportBrowserExtensionErrors option, which defaults to false. Set it to true if you want to see those errors too. Read more in reporting errors.
Configuration options
You can customize the Flare client using flare.configure(). Every option, with its default value, is listed on the configuration reference page.
Next steps
- Reporting errors: report caught errors and send log messages by hand.
- Client hooks: change or drop a report before it's sent.
- Sourcemaps: sourcemaps for Vite, Webpack, Next.js, Laravel Mix, and manual uploads.
- Logs introduction: send structured, searchable logs.
- Adding custom context and identifying users.
- How tracing works, manual spans, and sampling.
- How component profiling works: how framework packages time component mounts inside a trace.
- API reference and configuration reference.
Building with a framework? Go back to the JavaScript introduction to pick your framework's quick start or select your framework in the dropdown at the top of this page.